Create a Zenodo DOI
This page explains how to assign a Zenodo DOI to a Spec-Up-T specification.
What is a Zenodo DOI?
A DOI (Digital Object Identifier) is a persistent, universally recognized identifier for digital resources. Zenodo, an open-access repository developed by CERN, assigns DOIs to research outputs, datasets, and other artifacts. A Zenodo DOI provides a permanent, citable link to your work — ensuring accessibility even if the hosting URL changes, and enabling proper attribution in academic and technical references.
By minting a Zenodo DOI for your specification, you make it:
- Citable — others can reference it in papers and standards work
- Discoverable — it appears in academic databases and search indexes
- Preserved — Zenodo stores a full copy of the repository for long-term archival
What we want to achieve
The goal is to embed a Zenodo DOI link directly in the Spec-Up-T document. This link points to a Zenodo record that holds a full copy of the specification repository, uploaded as a ZIP file.
The ZIP file is generated automatically when a GitHub Release is published. A GitHub Release is created from a Git tag. The workflow is therefore:
- Reserve a DOI on Zenodo
- Embed the DOI URL in the specification source
- Create a GitHub Release (which generates the ZIP)
- Upload that ZIP to Zenodo and publish the record
Two approaches
There are two ways to integrate Zenodo with a GitHub repository:
- Automatic — connect Zenodo directly to the GitHub repository so releases are uploaded automatically
- Manual — upload the release ZIP to Zenodo yourself
This guide covers the manual approach.
The key insight is to reserve the DOI before publishing. Zenodo lets you reserve a DOI in advance so you can embed it in the document prior to uploading the ZIP. The DOI is only formally registered once you publish the Zenodo record.
Example DOI: 10.5281/zenodo.18797357
Example markdown link:
[https://doi.org/10.5281/zenodo.18797357](https://doi.org/10.5281/zenodo.18797357)
Working with forks
If you are working on a fork, complete all preparation steps — including embedding the DOI — on the fork. Open a pull request and merge into the upstream repository before proceeding with the release steps below.
The following steps must be performed from the upstream (original) repository:
- Create a Git tag
- Create a GitHub Release
- Upload the release ZIP to Zenodo
- Publish the Zenodo record
Step-by-step guide
Summary: Reserve a DOI → embed it in the specification → create a GitHub Release containing that updated specification → upload the release ZIP to Zenodo → publish.
Steps 1 and 2 can be done while working on a fork. Steps 3 and 4 must be done on the original (upstream) repository, after the fork's changes have been merged.
1. Reserve a DOI on Zenodo
This step is done entirely on the Zenodo website and is independent of any repository. You can do it at any point before creating the release.
-
Navigate to https://zenodo.org/uploads/new
-
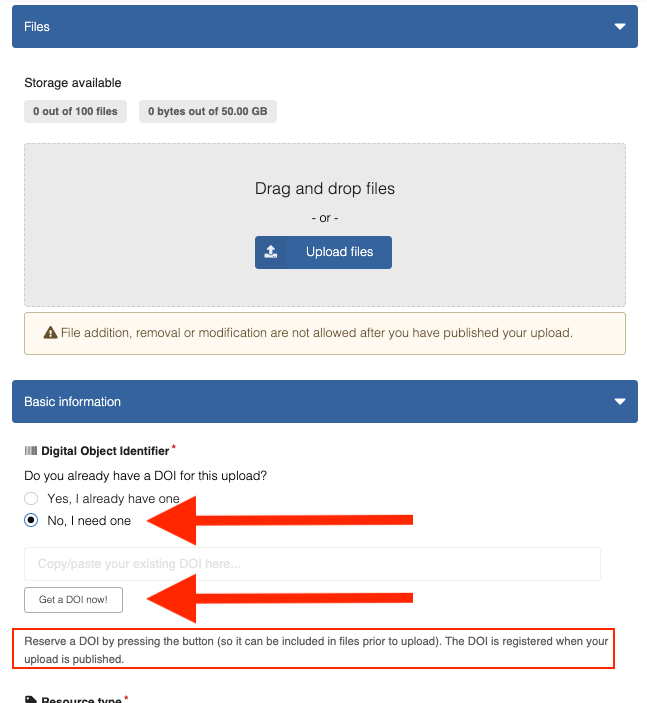
When asked whether you already have a DOI, choose "No, I need one"
Zenodo displays the message: "Reserve a DOI by pressing the button (so it can be included in files prior to upload). The DOI is registered when your upload is published."
-
Click the button to reserve a DOI
-
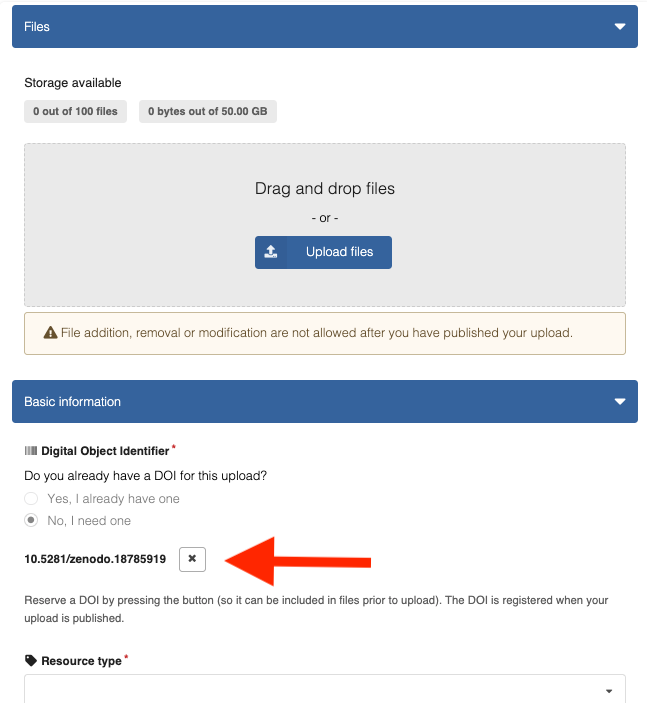
Construct the full URL by prefixing the DOI with
https://doi.org/Example:
https://doi.org/10.5281/zenodo.18785919
2. Embed the DOI in the specification
Do this step on your fork (or directly on the original if you are not using a fork). The DOI must be present in the source before the release is created in step 3.
- Copy the markdown link with the DOI (example:
[https://doi.org/10.5281/zenodo.18797357](https://doi.org/10.5281/zenodo.18797357)) - Paste it into your specification source (preferably near the top, e.g. in
spec-head.md) - Commit and push
- If working on a fork: open a pull request and merge into the original repository before continuing
3. Create a GitHub Release
This step must be performed on the original (upstream) repository, not on a fork. The DOI is meant to be a permanent citation pointing to the authoritative source. A Zenodo record built from a fork's release would not represent the canonical version.
- In the original repository on GitHub, go to the Releases section (right sidebar) and click "Create a new release"
- Create a new tag (e.g.
v1.0) by typing it in the tag field and confirming - Enter a release title — this can match the tag name or be more descriptive
- If this is a pre-release version, check the "Pre-release" checkbox
- Publish the release
GitHub automatically generates a ZIP archive of the repository at that tag.
4. Upload the ZIP to Zenodo and publish
Use the ZIP generated by the original repository's release in the previous step.
- Return to the Zenodo upload page you opened in step 1
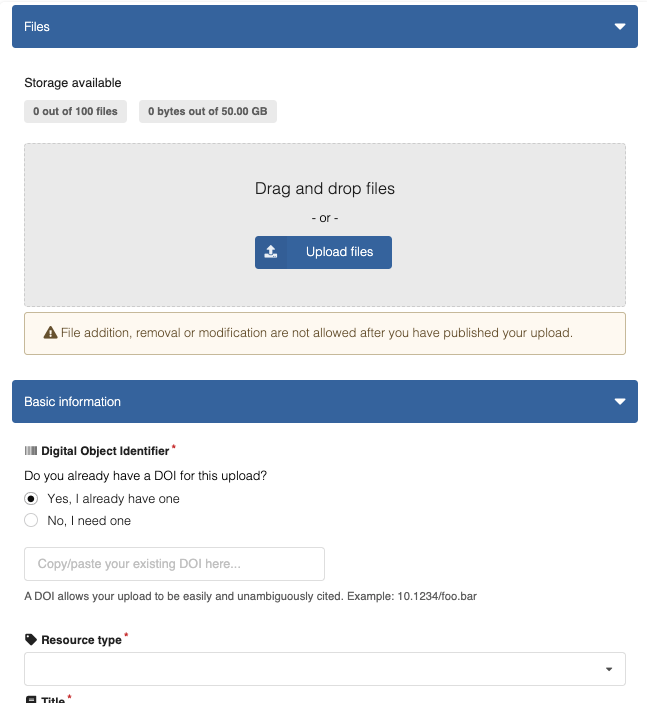
- Upload the ZIP file generated by GitHub using the "Drag and drop files" or "Upload files" area (this appears above the DOI reservation section)
- Fill in the required metadata (title, authors, description, etc.)
- Click Publish — the reserved DOI is now formally registered and the record is live
For more details on the DOI reservation process, see the Zenodo documentation.
Troubleshooting
How to edit a GitHub Release
If you need to make changes to a published GitHub Release (for example, to update the specification source after building, or to embed a corrected Zenodo DOI), you must move the existing tag to point to a new commit. This causes GitHub to automatically regenerate the release archives from the updated code.
These steps must be performed on the original (upstream) repository, not on a fork.
Step 1: Commit your changes
Make your changes to the specification source files and commit them to the main branch:
git add .
git commit -m "Update specification source"
git push origin main
Step 2: Move the existing tag
Update the existing tag (e.g., v1.0) to point to the new commit. Git tags are immutable and point to specific commits, so you must delete the tag locally and remotely, then recreate it at the new commit:
git tag -d v1.0                  # delete the local tag
git push origin :refs/tags/v1.0  # delete the remote tag
git tag v1.0                     # recreate tag at current HEAD
git push origin v1.0             # push the updated tag to GitHub
Step 3: Verify the release archives were regenerated
Navigate to the Releases section of your repository and confirm that the source ZIP and tar.gz archives have been updated. These are not stored as assets — GitHub generates them on-the-fly from whatever commit the tag points to. You can verify they are new by checking the file timestamps or downloading and inspecting the contents.
Step 4: If you updated the Zenodo link
If the changes include an updated Zenodo DOI reference, download the new release ZIP and re-upload it to your Zenodo record, then publish the updated record.