GitHub Personal Access Token (PAT)
Find more general information on the GitHub website.
Spec-Up-T and PAT
When you look up external references (xref's) in Spec-Up-T, you are using the GitHub API (Application Programming Interface), and you quickly run into a limit set by GitHub. With a Personal Access Token (PAT), you suddenly get a much larger budget. Therefore, it is highly recommended to create such a token; it just takes some time to create it.
-
Without a Token (Unauthenticated):
- You can make up to 60 requests per hour.
- This limit applies per IP address.
-
With a Personal Access Token (Authenticated):
- You can make up to 5,000 requests per hour.
- This limit applies per user/token.
- Using a token significantly increases the number of allowed requests, making it essential for high-volume API interactions or automation.
What is a PAT?
A Personal Access Token (PAT) is a secure key used to authenticate with GitHub via the API, Git, or third-party tools. It replaces passwords for programmatic access.
Why Use a PAT?
- Secure Access: Avoids using passwords in scripts and tools.
- Granular Permissions: Control what the token can access, like repositories or workflows.
- Automation: Enables integration and automation workflows.
Who Needs a PAT?
- Developers: For scripts or Git operations.
- DevOps Engineers: To automate CI/CD pipelines.
- Admins: Managing GitHub resources.
When Do You Need It?
- Using Git over HTTPS.
- Automating tasks via the GitHub API.
- Configuring workflows or accessing private repositories.
Steps to take:
- Get the token
- Use the token during build-time
- Use the token client-side
Get the token
To obtain a Personal Access Token (PAT) for the GitHub API, follow these steps:
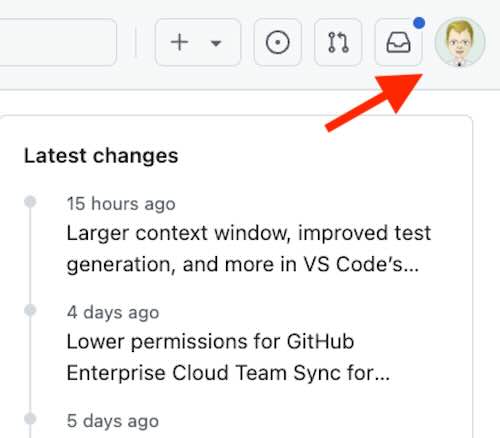
- Log in to GitHub: Go to GitHub and log in to your account.
- Navigate to Settings:
- Click on your profile picture in the upper-right corner.
- Select "Settings" from the dropdown menu.
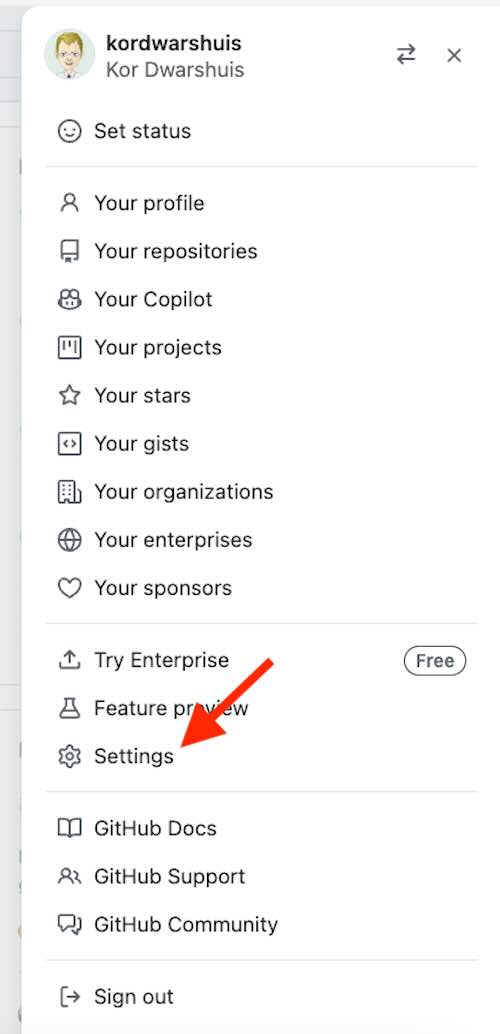
- Access Developer Settings:
- In the left sidebar, scroll down and click on "Developer settings".
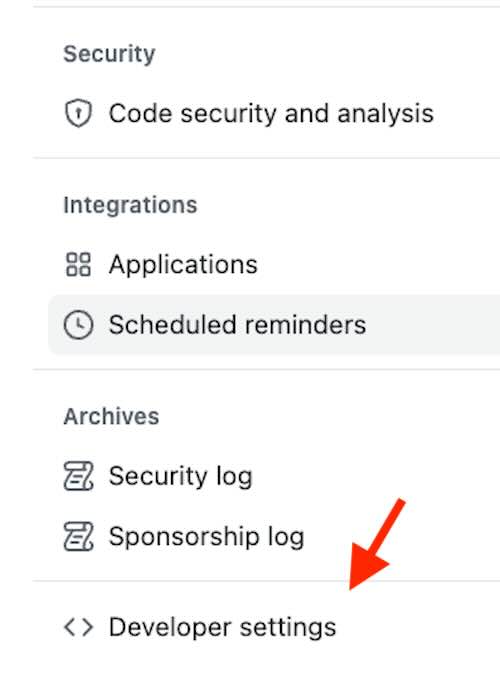
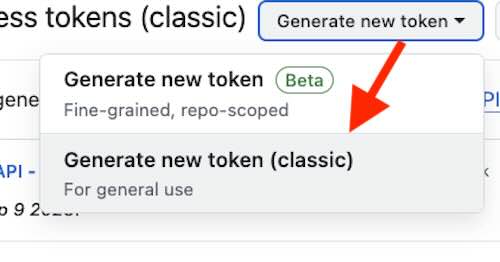
- Generate a New Token:
- Click on "Personal access tokens".

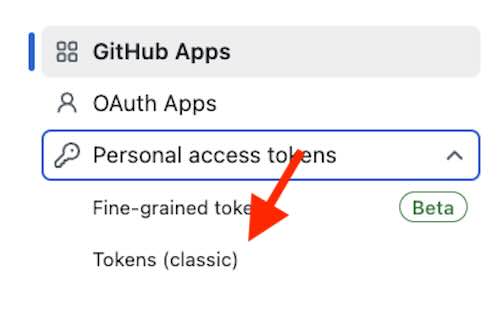

- Click on "Generate new token".
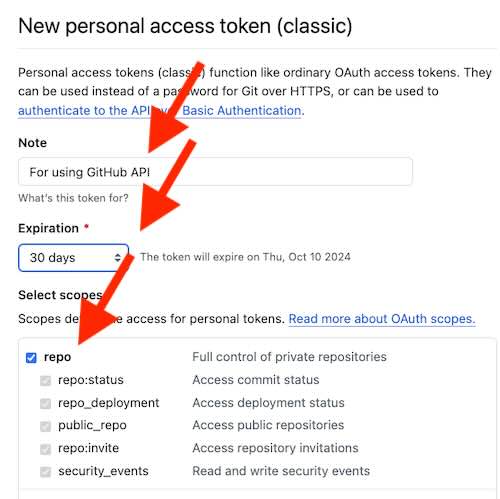
- Configure the Token:
- Give your token a descriptive name.
- Select the “repo” scope.
- Update (not visible in the image): also select the “workflow” scope.
- Click "Generate token" at the bottom of the page.
- Copy the Token:
- Copy the generated token and store it securely. You won't be able to see it again once you leave the page.
- Apply the token:
- Paste the token in the
.envfile of your Spec-Up-T installation or click on the button with the key symbol (top right) of your specification website.
- Paste the token in the

The token will now be used when making requests to the GitHub API.
Use the token server-side
-
Make a copy of the file
.env.exampleand name it.env. -
Enter the token in it:
# Optional GitHub API token for increased rate limits
GITHUB_API_TOKEN=YOUR_GITHUB_API_TOKEN
Replace YOUR_GITHUB_API_TOKEN with the token you created:
# Optional GitHub API token for increased rate limits
GITHUB_API_TOKEN=ghp_example1234567890abcdefEXAMPLETOKEN123456
Use the token client-side
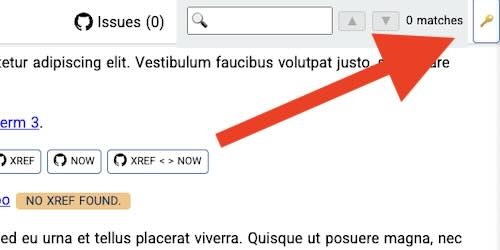
At the top right of the screen, you will see a button with a key. Click it, and an input field will appear. Enter the token here and confirm.